|
|
||
|
TIME and MOTION Cooperate to Produce Unique Photographs of the Ocean's Power
|
|
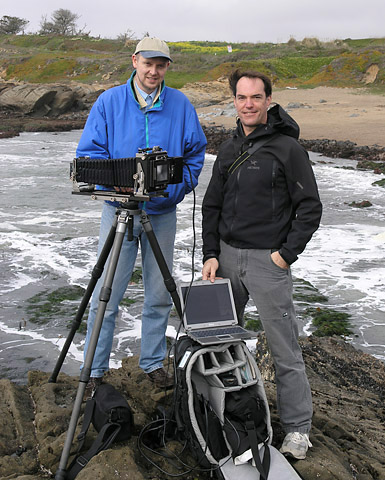
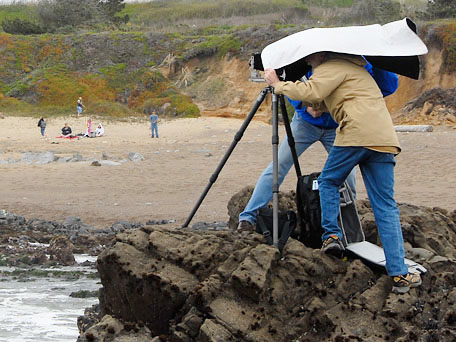
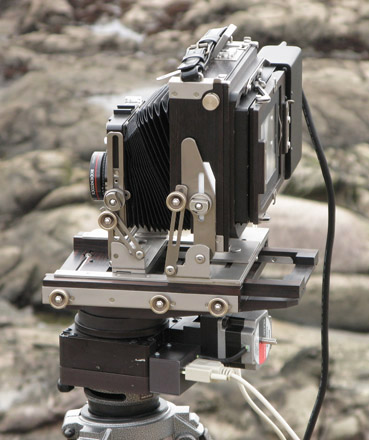
Pebble Beach, San Mateo County, California -- March 17, 2007 Because of the time required to capture each high-resolution image, scanning backs are usually not considered for photographing moving subjects, but these unique image recording devices can produce equally distinctive results with certain kinds of subject motion. For example, I have seen several beautiful examples of ocean surf photographed by Better Light owners, but I didn’t have any examples of my own that I could share with everybody. When pro photographer Robert Leslie (www.leslieimage.com) contacted us recently expressing interest in seeing how a Better Light scanning back would interpret moving subjects, I invited him to join me for a trip to the ocean to try a few experiments. Also joining us was Mark Liebman, the founder and president of Pictopia (www.pictopia.com), who became interested in our experiments after a conversation with Robert. We met at Better Light’s facility in San Carlos, and traveled about 30 miles to nearby Pebble Beach to take scanning photographs of the Pacific Ocean. Although it was bright and sunny in San Carlos, a layer of low clouds provided welcome diffusion when we arrived at the coast. However, the gray clouds also made for rather gray water, as can be seen in this picture of Robert (left) and Mark with the equipment. Mark is holding my lightweight laptop to prevent it from being blown off the backpack by the constant wind off the ocean, which also made setting up and focusing the camera more interesting, as shown in the photo below. |
||||||||||||||||||||||||||||||||||||||||||
|
||||||||||||||||||||||||||||||||||||||||||
| Fortunately, an extremely low tide minimized any wind-driven spray and allowed us to set up right at the edge of a rock outcropping overlooking the water, high enough to get a great view. My Ebony SV45U2 field camera proved to be quite stable in the wind, even when using a 450mm lens, thanks in large part to the sturdy platform provided by a Gitzo G1548 carbon-fiber tripod and G1321 leveling head.
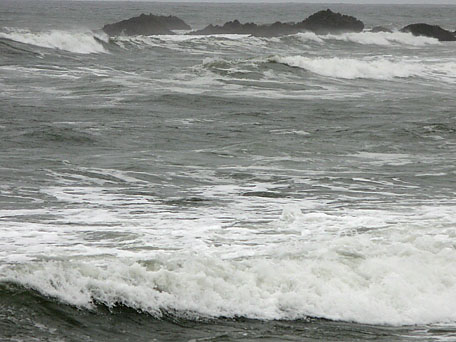
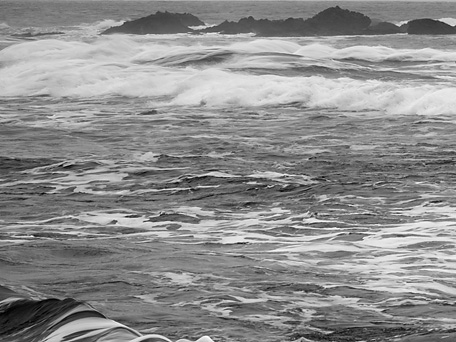
I knew that our images of the moving waves would be affected by the lens focal length (image magnification), the scanning back’s exposure setting (scan speed), and by the orientation of the scanning back in the camera, which would establish the scan direction relative to the direction of the waves. To minimize the variables for our brief visit, I kept the scanning back’s exposure setting at 1/240 second per line for all images, for a constant 35 second full-resolution scan time. I captured images with three different scanning back orientations using a 135mm lens, then switched to a 450mm focal length and made another series of images. |
||||||||||||||||||||||||||||||||||||||||||
|
||||||||||||||||||||||||||||||||||||||||||
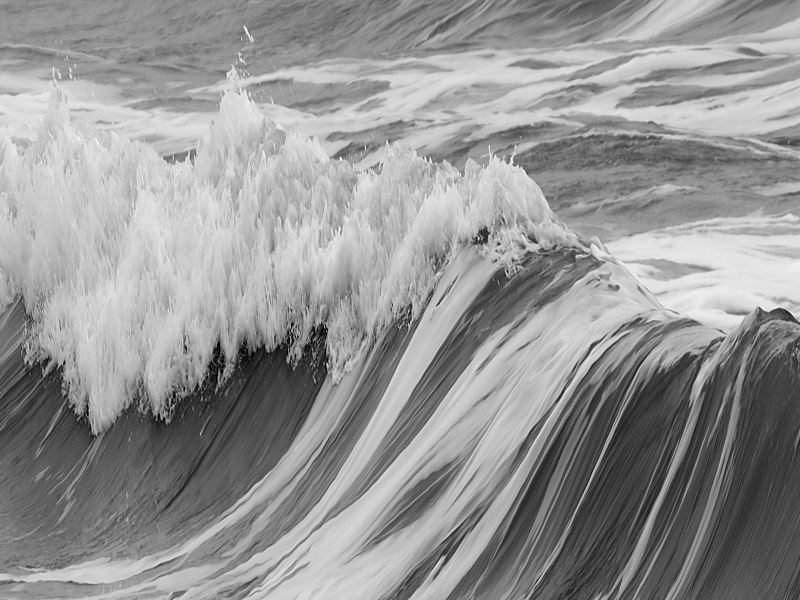
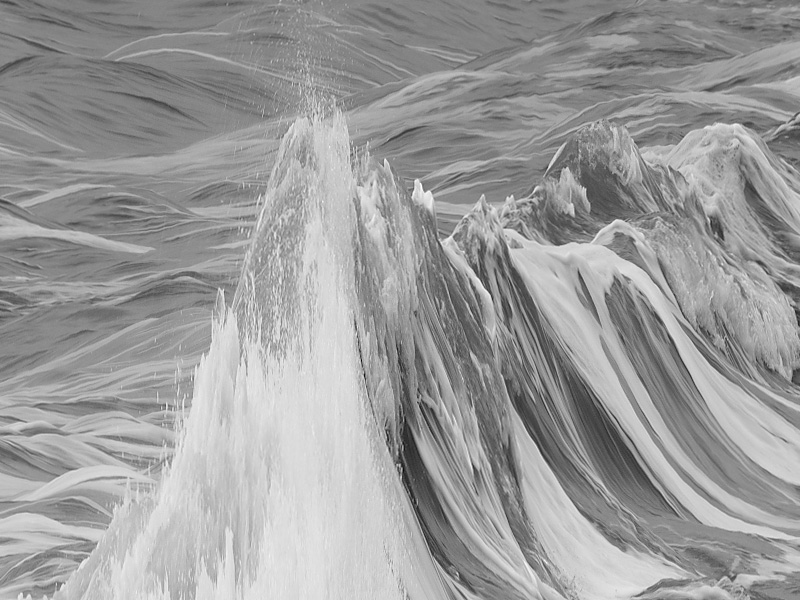
| Our rather monochromatic subject meant that motion artifacts caused by the moving waves would be the predominant source of color in the scanning back images. There is a slight delay in the time that each color channel gets recorded for each line of the image, and if the subject moves during this time, it will appear in a slightly different location in each color channel. Continuous subject movement therefore causes the color channels to appear slightly out of registration, and this misregistration among colors creates colored artifacts, particularly along high-contrast edges.
Alternatively, the almost-colorless subject also meant that I could choose a single color channel to make black and white photographs without losing much from the original scene. Using a single color channel eliminates any misregistration for a much sharper result. Unless otherwise noted, the following examples use only the green channel of the original color images from the scanning back to make black and white photographs. |
||||||||||||||||||||||||||||||||||||||||||
|
||||||||||||||||||||||||||||||||||||||||||
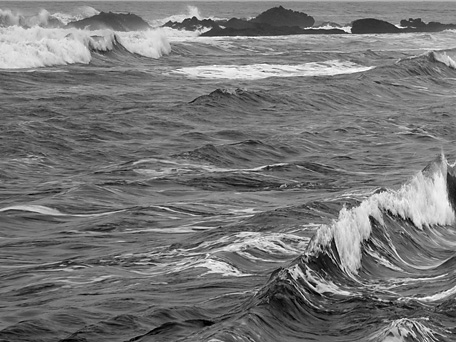
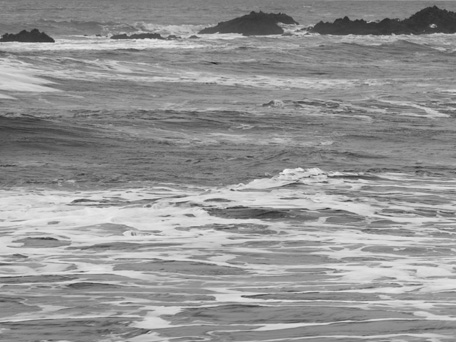
| Below are full-resolution black and white samples from the scans done with the 450mm lens. The first is from the image scanned in THE SAME direction as the moving waves, while the second is from the image scanned AGAINST the direction of the waves. Each vertical line of pixels in these examples was exposed for 1/240 of a second, with adjacent lines exposed sequentially -- left to right in the first example, or right to left in the second. The short exposure for each line effectively “freezes” the water at that location, and the smooth sequential exposure provided by Better Light scanning backs produces smooth contours of the surging water, for a unique photographic interpretation not possible with any other method. Each of these 800 x 600 pixel examples represents one percent of the entire 8000 x 6000 pixel originals -- click the Zoomify links to examine the rest. |
||||||||||||||||||||||||||||||||||||||||||
 |
||||||||||||||||||||||||||||||||||||||||||
|
||||||||||||||||||||||||||||||||||||||||||
 |
||||||||||||||||||||||||||||||||||||||||||
|
||||||||||||||||||||||||||||||||||||||||||
|
||||||||||||||||||||||||||||||||||||||||||
 |
||||||||||||||||||||||||||||||||||||||||||
|
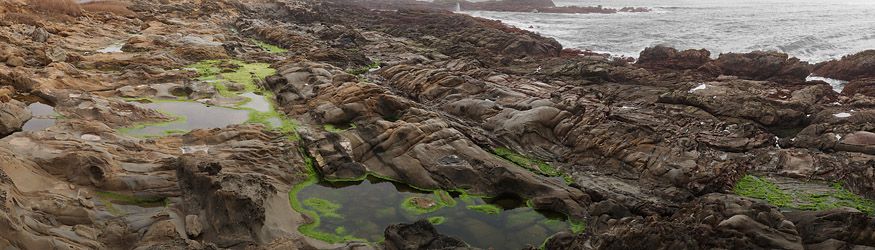
Above is the resulting panoramic image, encompassing about 105 degrees of horizontal view. This 378 megapixel, completely uninterpolated digital image was scanned in just 90 seconds using a Better Light model 6000-HS with the Pano/WideView adapter. Click the Zoomify link below to examine the full-resolution image. |
||||||||||||||||||||||||||||||||||||||||||
Return to Top of Page |
||||||||||||||||||||||||||||||||||||||||||