
BETTER LIGHT'S 10th "Almost Annual" OWNERS CONFERENCE
June 2nd - 3rd, 2011 Location: Better Light Offices & Studios, San Carlos, California
Conference Attendance Rebounds
for One of Our Best Ever
From the very beginning of our announcements regarding the 2011 “Almost Annual” Owners Conference there was a noticeable enthusiasm about the event and we had high hopes of rebounding from several years of low attendance. We were not disappointed as the registrations kept coming in steadily over the months leading up to the event.
Nearly half of the 52 attendees came from east of the Mississippi River, including five from Canada, two from Finland, and one from Switzerland. Seventy-four percent were owners who have attended at least one other conference in the past ten years, and 19 of them have attended five or more events. That is great testament to the value of the Owners Conference as a unique inspirational and educational opportunity.
Over the past eighteen months Better Light and Archetype Digital Imaging Alliance have hosted several educational series of one-day classes on specific topics related to photography with the scanning back. To extend the value of the conference trip for our owners, we offered optional classes on each side of the two Conference days. On Wednesday, we had three different half-day classes. The morning session covered the basic scanning workflow and the ViewFinder software; in the afternoon Ben Blackwell discussed lighting artwork in the studio environment and Randy Hufford presented a program about the uses of Adobe Lightroom for image enhancement and cataloging. Following the conference, Mike Collette presented a sold-out one-day workshop on Advanced Image Processing and Randy Hufford held a workshop packed with new ideas, products and techniques for fine art photographers and printmakers. All of the classes were very well attended and some of these will be repeated in the future. Watch the Better Light discussion forum for announcements.
I know I’ve said it before, but this could (really) be the best conference we have had. The attendance was back to expectations, and the topics were very diverse — from mountain expeditions to linear scanning, with marketing, profiling, and customized equipment in between. A great big “Thank You” goes out to all the speakers who did such a great job of sharing their knowledge and providing inspiration and motivation to the group.
The significant percentage of owners who come back year after year, demonstrates the value that the Better Light Owners Conference provides. It is such a unique opportunity to share ideas and techniques with others who do the same kind of work and demand the same level of quality in their images. As Better Light owners, we all share a desire to create the ultimate in digital images, whether our subject matter is original art, commercial products, architecture, or landscapes…we all share a passion for perfection.
This conference report is intended to give you a little taste of what the event was like and tempt you to join us in person for the next Conference. We have often been asked to videotape the programs or try a teleconference of some type…but there is just no substitute for being there. The continual discussions between the owners are so much of the value…that’s where the new ideas come from, where the problems are solved, and where the inspiration to try something new is generated.
We got off to a roaring start on Wednesday in our optional classes with over 50% of the Conference attendees participating…WOW! Many of our owners have never received any formal training on the use of the scanning back, so the basic workflow and ViewFinder class has always been a good opportunity to get on track with the latest recommendations for best practices. Ben Blackwell. one of our most experienced photographers in art reproduction, worked with a class in the afternoon to discuss lighting principles and showed a number of techniques to handle issues with art that is framed or under glass, has gold leaf or heavy glossed texture, and other common challenges. Also in the afternoon, Randy Hufford, a well-traveled convention speaker and Better Light user offered a four-hour Lightroom class that he has given to many groups around the country. From Import to Print, the group learned what to do, and in what order to do it.
Following the classes, we all headed over to the nearby Fairfield Inn, our primary hotel over the past years, for a welcome reception. This is a casual get-together to meet some of the new attendees and catch up with old friends. Small groups are found in every corner of the lobby talking shop and sharing stories. From what began years ago as a casual meeting of a few people in the hotel lobby, the opening reception now has become a lively event that is a terrific launching point for each year’s Conference. As the evening rolls on, the group fragments off to dinner at local restaurants…and some conversations keep on going into the wee hours.
Thursday morning came quickly, and everyone managed to get to the Better Light building in good spirits and ready for a hot cup of coffee to get thire eyes open and mind functioning at full speed again. Following an introduction by each of the attendees we were ready to get down to business.
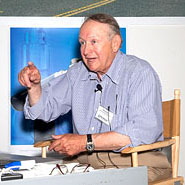
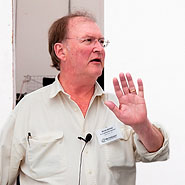
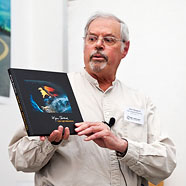
 As always, Mike Collette, owner of Better Light and inventor of the scanning back gave the opening presentation. He has been doing a tremendous amount of research and experimentation with his landscape images over the past several years and has developed his own workflow for capturing and rendering of the extended dynamic range present in many landscape scenes.
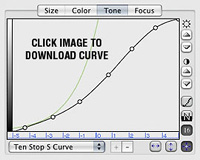
In his 2009 presentation “Wide Dynamic Range” (9 MB PDF download) Mike introduced a Ten-Stop S-Curve to handle the extreme brightness values often encountered in landscape photography. This curve is included as one of the preset tone curves in the most current version of ViewFinder software or it can be downloaded and imported into your curve set. This curve allows him to capture all of the detail in very high contrast scenes so he can adjust the tones to his liking in post-capture processing.
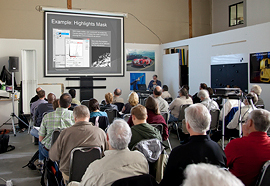
In this year's program, "Advanced Image Masking Techniques" (7 MB PDF download), Mike shared some of the tools he uses to gain control over specific areas of an image and optimize the final result. “The ultimate quality is dictated by the level of detail and refinement that you choose to do. You can use the Magic Wand or go deeper into channel selections, additional manual selections, and then use Refine Edge to make minute pixel adjustments,” Mike explained.
 In Photoshop, user-defined selections are used to make adjustments without affecting other areas — similar to darkroom dodging and burning, but with far more precision and subtlety, plus re-adjustment and undo options. After discussing the tools available to create and modify selections, Mike showed examples and the steps for creating a sky mask, highlight and shadow masks and ways to isolate and suppress edge artifacts.
These same techniques can be applied to other types of photography. He included examples from an art reproduction project where the specular and metallic highlights on a dimensional artwork needed repair. Instead of relying on sometimes unpredictable cross-polarization, he used two exposures — one normal and another modified to maintain detail in the areas that were overexposed, or to brighten up metallic gold that was not reflective under normal lighting.
 Peter Grote – Mountain Architecture Photography, Boston, MA
Expedition Photography…Taking You to New Heights
 Peter Grote has traveled the world to capture breathtaking, "mountain architecture" with the Better Light scanning back. He believes that large format equipment is essential to control perspective of massive vertical structures and that the large image format of the scanning back is unique in its ability to capture the detail, depth, and scale of mountain landscapes.
In this presentation, we got an insight into some of the preparation, equipment modifications, and behind-the-scenes challenges of his last trip to photograph the Himalayas in Nepal — the most difficult, but most photogenic mountain range. “The journey is a step back in time and culture…into space without the luxury of roads, hotels, and electricity,” Peter began, “We started preparations six months in advance to make travel arrangements and to begin physical conditioning and altitude training for a one month trip.” Eight people were in the group that participated in this expedition, but when you add in the sherpas who are the expert mountaineering guides; the porters to carry the gear, the cook and staff, there were forty people climbing steep narrow paths for eight-plus hours a day — all needing regular meals and tents for sleeping.
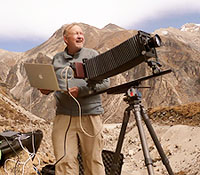 Peter’s guidelines for these trips are: Simplicity – take the absolute minimum; Redundancy – learned the hard way; and Flexibility. Over several trips he has seen that newer technology can be more fragile and may not work well over 15,000 ft. elevation. He carries about 155 pounds of equipment (1/3 electronics; 1/3 cameras; 1/3 cases and packaging).
 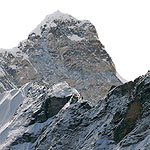 He also has about 35 pounds of personal gear (clothes, jackets, sleeping bag, etc.). “The toughest part is getting though securtiy,” Peter noted, “I carry a full camera system as carry on, just in case.”
Part of the equipment that he included on this trip was an extended bellows and rail for the camera and an 800mm lens(above) to photograph the north face of the Jannu Glacier as an assignment from a client who wanted a large and detailed photograph of Jannu's un-climbed Northwest Face. Peter’s high-resolution image of the face may help climbers better visualize some of the obstacles that could be encountered on such an attempt.
 John Paulson – John Paulson Photography, San Jose, CA
Niche Marketing to Build Sales in a Slow Economy
Regardless of our individual photographic specialties, we all share the common challenge of finding ways to get customers in the door and money into the bank. John is an aggressive marketer and showed us some of the ways he has tried to attract the attention of prospective buyers and encourage them to spend some money in today’s tight economy. He opened with the statement, “The only fair way of marketing is to be the only one people think about for your type of work. It’s a war out there and we need every advantage possible.”
John is a general practitioner with a mix of work including weddings, senior and family portraits, commercial work, and selling his own images as fine art. He has found that many of the sales tools he uses to attract one type of business can be modified and updated to search out opportunities in other market segments. His niche marketing concepts can be applied to fine art image sales, to build art copy volume, or to find new commercial clients.
Postcards have always been a popular form of advertising for all types of businesses and John uses them in many aspects of his marketing campaign.  He has quite a sense of humor that shows in the postcards he creates to mail to clients for holidays and special occasions. He created a card to promote his art copy work with a reproduction of his own Rembrandt etching on the front and a testimonial from Rembrandt “himself” on the back, complimenting John on his fine work.
"It’s a numbers game…if you want to sell your work, you have got to be out there”, John continued. There are many options to make photographic or printed books of your work as a single unit or in small quantities. The iPod and other tablets are excellent to show your portfolio in person and are very easy to customize.
If you are creating your own fine art photography you have to search out places to display your work. Art galleries, model homes, restaurants, furniture stores, office buildings…any place that has walls and public exposure can attract attention to your photography and sell some of your prints or create the opportunity for new commissioned work. John also participates in community auctions as fundraisers. You are helping the charity and getting strong exposure to potential buyers for a very small investment. “Be sure to ask for the name and email of the bidders so you can contact them again after the auction”, John suggested.
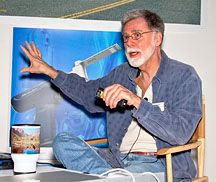
 Ethan O’Connor & Shannon Cheng – eocys, Seattle, WA
Out of the Fourth Dimension
Our Conference attendees were the first group “anywhere” to get a sneak preview of this revolutionary technology. Ethan O’Connor and his partner Shannon Cheng are developing a unique lighting and imaging effects software application. It is still quite “hush-hush” due to pending patents, but this technique would allow you to isolate each light source to change brightness, color, or shadows…and even “turn it off” after you have taken a photograph.
A relatively simple and affordable hardware accessory is added to existing lighting units to provide a means to “code” the lights to be able to isolate data from that source and manipulate it later. The system would work with Bayer sensor cameras, but requires multiple exposures, and can be used with the Better Light scanning back with a single scan. Any type of lighting can be used, especially LEDs. Electronic flash can be used with DSLR cameras.
Ethan discussed aspects of Reflectance Transform Imaging, Arbitrary Dynamic Range Scanning, Fluorescence and IR Imaging, Lens-less Imaging, and Continuous Spectrum Imaging…all able to be done with an unmodified or minimally modified Better Light scanning back. They want to start a discussion with Better Light owners and their clients about a framework to combine perceptual photographic techniques with archival formats that are based on radiometric standards rather than perceptual standards, and the implications of the differences between "Color" management and "Spectral/Perceptual" management.
Ethan said that his next challenge is to photograph Mt. Rainer, lit only by a laser pointer, from downtown Seattle. Good luck, Ethan…and I bet he does it!
 Bruce Ashley – Bruce Ashley Photography, Santa Cruz, CA
Studio Workflow with CameraRaw and DNG Profile Editor
Bruce got a bootlegged copy of Photoshop in 1989 and has been delivering digital images for over 20 years; first with his own drum scanner and with a Better Light scanning back since 2003. He does all his own shooting and retouching, primarily for commercial clients including Apple Computer, NEC, Plantronics and PayPal. His patience, professionalism and creativity shows in all of his work, and his consistent quality and attention to detail have contributed to enduring client relationships.
Product photography is his specialty — most smaller than a breadbox — some much smaller. His lighting is clean and simple, primarily with daylight fluorescent fixtures. Bruce began his presentation with a simple video tour of his studio and examples of the type of work that he has been doing and discussing the benefits of working with large format digital and the quality of the Better Light system.
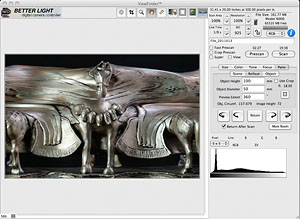
Recently he’s been experimenting with a new workflow utilizing the Adobe DNG Profile Editor. Better Light's current HS-models provide the option to save images as DNG files (Adobe Digital Negative). This format preservs all of the linear raw data with differences in the TIFF headers that allow the files to be opened in Camera Raw and Lightroom. Adobe DNG Profile Editor is a free public beta software program to enable photographers to edit DNG profiles.
Bruce likes this application because it gives him different controls and features than ViewFinder. After opening a DNG files he can do a neutral balance, and any color of the image can be selected and manipulated in Hue, Saturation or Lightness. Specific colors can be locked down to prevent changes while adjustments are made to other colors. “Since I work with products and packaging that requires accurate rendering of the company’s identity colors this type of control really helps me, Bruce stated, “and it is easy to use, plus it is a free download.”
 Since silicon-based sensors are quite sensitive to near infrared light (NIR) in the 700-1200 nm range, many Better Light users have taken advantage of the creative effects by capturing images with all or partial infrared lighting. Better Light is one of the only digital camera systems that uses a removable IR-absorbing filter. With the addition of external filters that pass NIR while blocking most or all of the visible light, infrared photography is possible with the scanning backs.
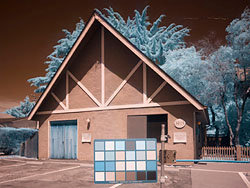
With a series of photographs of his studio building, Bruce showed the group a test with variations of visible light and near infrared light imaging (dowload test images & DNG profiles 7.1 MB). He made one standard full color image using the daylight (thinner) Infrared absorbing filter supplied with the Better Light. Three other exposures were made: 1) No IR filter on the lens, but a 1-stop neutral density filter was needed to bring down the exposure. 2) A dark red Wratten #25 filter over the lens that passes visible red and infrared wavelengths. 3) A nearly black #87 filter on the lens with 1.5-stops of neutral density for a full infrared capture. He made corrections to the color in the files and created a set of DNG profiles that can be downloaded as a start for your own infrared imaging and processing.
 Grant Kernan – AK Photos, Cowichan Bay, BC Canada
Engineering Custom Solutions to Common Obstacles
If there are alternate ways to improve quality, Grant will always be searching for solutions, and this program shared several of these quests for perfection. As a former employee of an Engineering College, Grant had access to the machine shop to play with photographic toys and has come up with some very practical and economical fixes for issues we all face with the Better Light scanning back.
Grant had always respected the sharpness and quality of his Bronica 645 lenses and hated seeing them collecting dust in the cabinet. When he purchased the Pano/WideView™ Adapter he realized that the circle of coverage for the lenses was adequate to cover the 72mm length of the sensor, but does not allow for any camera movements. By removing a bayonet mount from an old extension tube and attaching it to a recessed view camera lensboard, he was able to take advantage of the lens speed, depth-of-field, and sharpness of this glass for his panoramic photographs. He glued an empty 77mm filter onto the back of the mount so he could use the screw-in IR absorbing filters on the lens.
The sharing of ideas continued during breaks. Mark VanderSys had contacted Grant before the conference and bought a Zenzanon PE-75mm f:2.8 and E-14 extension tube to try on his Linhof. Mark made the suggestion that he would like to build a plastic box to mount the lens. This encouraged Grant to adapt a feather light Globus 4X5...(also collecting dust on a shelf). Grant sourced another Globus body and now there are two lightweight Betterlight “point-and-shoot” 4X5 Globus cameras. With a helical mount and an aluminum bracket the camera weighs in at 2 lb. 10 oz.
Most medium format lenses are 2 to 3 f-stops faster than view camera lenses, often f-2.8 or better, yielding faster scans with more depth-of-field. These lenses make it easier to scan under windy and low light conditions, plus there will be fewer problems with moving water, rustling branches, or changes in daylight.
 Inspired by Mark VanderSys’ presentation last year on “drag-outs” Grant thought why not move the art past the lens? That led to further engineering to have the Pano/WideView motor pull the art smoothly in front of the camera for a project to photograph a collection of old panoramic prints that were 10” high x 32” wide. In the diagram above, the diameter of the pano "wheel" was determined by dividing the 48" length of the art (shown in green) by 3.14 which rounded out to 16".
 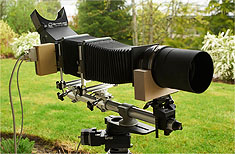 The track (blue) is twice as long as the art and open ended on both ends so the art is not stopped by anything. The red circles are pivot points for the cable. This configuration will return the rig to the starting point after the exposure. The concept worked well and will lead to another generation of the mechanism for even larger art pieces.
Grant continued showing how he has mounted an old Bush-Bis-Telar 360mm lens with another Bronica mount. After he removed a damaged front element he had a very nice soft focus lens. He also created a 4x5 view camera mount for a 600mm f-5.6 Nikkor lens (see photo). By using spare parts and some ingenuity, Grant created a rigid support for the lens with extra bellows length and a push on filter holder…all fitting on an extended Sinar rail. The image results were impressive and well worth the effort.
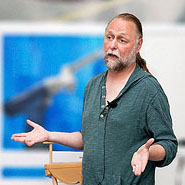
 Randy Hufford – Limited Editions, Kula, Maui, HI
It’s Alive… Bringing Your Creative Dreams into Reality
After a delicious BBQ dinner break we asked Randy Hufford to provide an upbeat cornucopia of ideas and a behind-the-scenes look at the creative stimuli, problem solving, and Photoshop techniques he uses to enhance photographs and accomplish unique imagery for a competitive edge.
To achieve success as a photographer, Randy preaches the mantra of “Presentation! Presentation! Presentation!” We have to show our images to the public to sell prints or to book new photo assignments.
 "If you can dream it, you can do it,” Randy emphasized, “you must be aware of the tools and products available to help you and think ahead for ways that you can use digital technology to create images with drama, impact, and a WOW factor.”
For studio product work, we no longer have to live with the actual photographed background and any limitations or obstacles caused by it. “Dream It…and Do It! Conceive the image as you would like to see it, Randy encouraged, and “If you want a glowing blue background behind the jewelry it can be done.” He demonstrated how he created a jewelry ad using the Pen tool to create an accurate outline of the product; then created a color layer for the background and added black vignettes to build a spotlight effect; and finally added type to complete the job.
One of the latest trends is HDR (high dynamic range) images…and like all trends, is often abused, misused and overused. HDR is a valid creative technique for the right image, but can also be a valuable technique when faced with very difficult lighting conditions. Randy showed a very useful application of HDR for some architectural interiors. By using multiple Better Light scans to capture all of the shadow and highlight details, the natural lighting of the interior lighting and daylight was captured beyond what a single exposure could accomplish. Blending with an HDR processor or manually masking the images can create stunning results.
Stitching images together is another technique that is becoming increasingly common since Photoshop and other companies have produced applications that do the job of overlapping, scaling, and blending the image layers. Randy wanted to use these tools to stitch scans of artwork, so with the help of his father, Rick, a retired cabinetmaker, they have added a sliding rail mounting system to their R&R Copy Wall easel that allows the art to be slid side-to-side and remain perfectly parallel to the camera.
This gives you the opportunity to photograph larger artwork in several sections to stitch together in the computer. Stitching becomes an option for limited studio space or when faced with large or odd-shaped art pieces. It can also be a solution when lighting is causing serious reflections or you want to place the lights for optimal brightness and evenness over a smaller area. “Everything is level, parallel and controlled so stitching is simple and very accurate. Just allow for a 30% overlap, shoot your series of images, and use “Reposition” layout mode in Photoshop’s Photomerge tool,” Randy added.
Larry Guyer – A la Carte Digital Studios, Foster City, CA
Steps to a Successful Camera Profile
From recent Owners’ Forum posts it is obvious that there is much confusion and misinformation about the best way to make an ICC camera profile for the scanning back. This presentation outlined the step-by-step procedures used at the Better Light studio to create reliable profiles, and also provided an explanation of factors that can improve the quality of your profiles to optimize color reproduction and cut your time making selective color corrections. A 7.5 MB PDF file of the presentation can be downloaded.
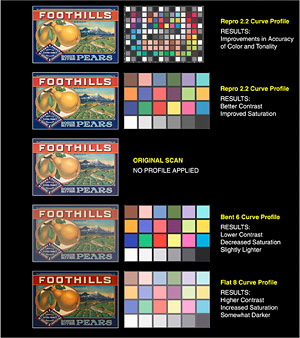 The scanning back is an extremely accurate and precise digital capture device and our owners are a higher echelon of image-makers who demand quality and perfection beyond the expectations of the majority. It’s a problem, however, because most equipment and software is designed to meet the needs of the masses.
We want to have a profile that will provide repeatable and satisfactory reproduction of the original. This is accomplished by creating as close to a “laboratory perfect” capture of our color chart as possible. By avoiding any capture errors or other variables, the resulting profile will get results from most scans that are as accurate as possible and minimize labor and proofing runs.
Variables that cause problems include: Light falloff, contrast of the chart capture, exposure errors, veiling glare, selection of color chart, and misunderstanding the profile-making software. Consider that any error we introduce into the capture will be inverted (“corrected” by the profile-making application) and applied to the final image. For example, veiling glare in the capture environment can contaminate the black density of the color chart and increase the brightness of darker patches. When the profile is made, the software determines that the blacks are too light and makes a profile that corrects for this. When applied to the final image the blacks will be darker than expected, increasing contrast and boosting color saturation.
By using the right tools, ToneZones, Equalight™, and Repro 2.2 Curve, we can create a better quality scan of the color chart and reap the benefits of a more accurate color profile. However, profiling is still an imperfect art and all colors for all subjects will not necessarily be perfect. Some local color corrections might still be needed.
 Mark VanderSys – Pixel Light Digital Imaging, Boise, ID
Drag-Outs…Extreme Linear Scans
Mark has truly become addicted to the Pano/WideView™ motor assembly and has taken it to new lengths (pun intended). Last year he shared a photograph done for Hewlett-Packard to demonstrate their large printers at trade shows — he captured a 3.5 GB file of a large “G”-scale model train with a single unstitched scan. The demo prints were 9 feet wide and 40 feet long. We asked him back to elaborate on the process and share some of the additional experimentation and retrofitting he has done to make his “drag-outs” more accurate, efficient, and profitable.
His tool of choice is the Pano/WideView Adapter and the control application that is part of standard ViewFinder™ software. For all of these variations the sensor is stationary behind the center of the camera lens, capturing only one row of pixels at a time. The motor system can rotate the camera for a Panoramic image to create up to a 360° image. With the camera stationary, a platform can be mounted on the motor assembly to create Rollouts (vertical sensor) and Spinouts (horizontal sensor). Mark created the train images as a Dragout, where the Pano motor rotates a large disk that serves as a pulley to drag a platform horizontally in front of the camera lens. This produces an image that has no lateral perspective from the angle of view of the lens. In Dragout mode, every row of pixels is from the center of the lens for maximum sharpness, identical perspective and consistent lighting. “It is like shooting with just a slit for a lens opening”, Mark explained. “It enables us to add flags and reflectors very close to the subject to help perfect the lighting.”
Creating a Scene Panorama is straight-forward and only requires noting the lens focal length and the desired view rotation up to 400°. Working with the Pano Adapter for Rollouts, Spinouts and Dragouts is not quite as easy because the aspect ratio must be calibrated — in other words, to tell the pano adapter how fast to turn. The subject in front of the camera can be stretched or compressed if the movement is not set properly for the lens focal length, lens to subject distance, and the size and shape of the object. Creative liberties, of course, are permitted and encouraged. The preview image in ViewFinder will allow you to experiment and see what kind of results you should expect on the final scan. Download a movie file (22 MB .mov file) with some of the examples and video clips from Mark's presentation. Click on movie frame to advance to next slide or to start the video clips
 Mark’s obsession with the Pano adapter is accelerating…he is continuing his experimentation with creative Spinouts in several ways: He is trying different shaped cylindrical and translucent objects to add extra variables to the rollouts; by moving backgrounds in closer to create shadows from the subject pieces, another element is added to the image from the shadow “moving” as the objects rotate past the lights on the platform; and his latest adventure is the “triple-twist” spinout where he has multiple platforms rotating at different distances to expand the depth and scale of the patterns. (See a short video on Mark’s blog at www.pixelight.com).
 Ben Blackwell – Ben Blackwell Photography, Alameda, CA
Lighting the Hard Way — Adventures Outside the Studio
Over the years, Ben’s skills have been tested to photograph paintings, sculptures, and conceptual art installations under difficult conditions in collector’s homes, cramped galleries, artist’s studios, and outdoors. He has dealt with the obstacles and maintained quality under the pressure of time constraints and physical limitations.
In a perfect world we have all of the time and tools to do a perfect job all of the time. Ben outlined his preferred workflow beginning with the Zig-Align™ mirrors to get perfect alignment for edge-to-edge sharpness; using ToneZones™ to visually adjust the lighting for optimum evenness and then perfecting the illumination with Equalight™ to compensate for any remaining variations in brightness. And, of course, having a studio space with plenty of room, sturdy tripods, lots of lighting, and all of your gadgets and accessories at hand.
Ben’s world is seldom like this…these ideal conditions and techniques are often unavailable. He may be asked to shoot in the corner of the artist’s studio where there is little space for a tripod and lights, so decisions on how to light the art may need to be compromised. Some art must be photographed in the gallery or museum with big outside windows and mixed ambient light that bring additional challenges to maintain color management and good subject lighting.
Regardless of the circumstances facing him, Ben will make every effort to capture the images with his Better Light scanning back. “The high resolution, superior color and detail, and view camera benefits make the struggles worth while.” Ben stated, “The customers can see the difference and often insist that their art is photographed with the Better Light.”
 Even when working with museums, there are many obstacles to overcome. “A surprising number of museums don’t have studios, or have studios that are too small to shoot many of the larger pieces in their collections,” Ben noted. “Many of the large paintings are hung on gallery walls and cannot be taken down easily and we also have to photograph many unusual contemporary art installations.”
Sometimes, an art photography assignment can get as complicated as an advertising or fashion shoot with curators, conservators, registrars, carpenters, and maybe the artist, all on-site to add their expertise and protect their interest in the project. Because the art is very valuable and fragile, only certain people on the museum staff can move or handle the art, so the task can get delayed or altered easily.
 Art is often located in a collector’s home or in a corporate location where access becomes an issue to coordinate with the owner’s schedule or the company’s policies and business hours. “We’ve photographed art in luxury homes, in basements and garages, lavish corporate conference rooms, and small storage rooms. It is really important to ask questions before the shoot to understand what we are going to be faced with on site,” Ben added.
The van is always loaded to the ceiling with a variety of lights, cameras, lenses, computers, and all of the accessories. “We try to stay as compact and portable as we can, but you still have to be prepared for just about any curve-ball”, he explained.
Most of the camera gear and the scanning back fits into his large backpack. He uses a Multi-Cart (www.multicart.com) to roll most of his equipment into to buildings and it serves as a convenient worktable during the shoot. Depending on the job, he will carry 600-watt and 900-watt Northlight Copy Lights, 150-watt Buhl Softcubes or DeSisti Broad Lights, 1000-watt tungsten Tota-Lights or Arri Spotlights. Often, the lighting will be dominantly from bounced light off of the ceiling or a nearby wall. In other cases, raw light, diffusers, or reflectors will be needed to enhance the shaping and texture of the original…and in all cases provide even illumination and accurate color. One of the most important tools is a 10 ft. wooden tripod to get the camera high in the air in the many situations that require shooting straight-down or at a steep angle.
Innovation, creative problem solving, and using all of his digital tools and art background helps Ben create high-resolution reproductions of flat or dimensional artwork…big or small…inside or outside…for client’s all over the country. Download Ben's presentation (22 MB PDF).
 John Csongradi, John Csongradi Photography, Hillsborough, CA
Surface-Scapes — Abstract Still Life Rollouts
John is a retired orthopedic surgeon who now has the opportunity to pursue his interest in photography. Like others who have purchased a Better Light scanning back with a non-commercial motivation, he is interested in the creative expression and personal satisfaction that photography as an art form can offer.
He was initially introduced to landscape photography with the Better Light by Stephen Johnson, but learned that it took a lot of effort. Forty pounds of equipment and uncertain weather conditions encouraged John to search out other outlets to satisfy his photographic curiosity and creativity.
While visiting Better Light's facility, John saw samples of Rollouts of Mayan vases. He wasn’t as impressed with the photo as much as with the technique and discovered that the Pano/WideView™ Adapter in Rollout mode was the tool for creative expression that he was looking for. There were no major technical obstacles for him to deal with. Lighting was elementary since only a “slit” of light was necessary for Rollouts. The captures are made with the camera stationary and the sensor in the middle of the lens recording one vertical row of pixels as the subject rotates on the turntable in front of the camera. “It creates a two-dimensional image of a 3D object,” John explained, “It’s like peeling a label off of a coffee can.”
 I could take unconventional items, use very simple lighting, and make my own decisions about how something should look by changing the speed, angles and starting points of the Rollout rotation,” John said. “Thank God for prescans,“ he continued, “It’s always a surprise when you see the preview image. If you don’t like it, try something different until you get something that has creative excitement…and there is no surcharge for experimentation.”
John loves to create abstract images that make people wonder, “What the heck is that!” From sea shells to glass paperweights…countless objects have twirled on John’s Pano/WideView™ turntable and become works of art. He breaks the rules to achieve his unique results, experimenting with speed of rotation, lenses, perspective, and lighting.
 He is continually searching for creative excitement, finding beauty and mystery in some of the most unusual pieces — always checking the “dust collectors” around the house, digging through other peoples’ junk, visiting the Goodwill store, and searching the garden and grocery store for new things “to play with”. “Ugly things in life can be really cool in Rollouts,” John proclaimed. Download John's presentation to see many more examples of his rollouts. You can view many of John's Surface-Scapes in his website gallery.
In conclusion, John recommended the book Wynn Bullock: Color Light Abstractions for creative inspiration. There are similarities between John’s point-of-view and Wynn Bullocks’ philosophy as observed in this quote from his website:
"Another important aspect of my light photography is that I have complete freedom of composition and instant color control. Equally important, I have complete control of the image at the moment of taking the picture as I compose in the ground glass of the camera and see exactly the final results that will appear in the print or color transparency.”
Mysteries lie all around us,
even in the most familiar things, waiting only to be perceived.
Wynn Bullock
 Tim Fleming Tim Fleming Photography, Clovis, CA
Art is All Around You” — Fine Art Photography in the Field
E-cre8.com is his website (pronounced "E-create"); a word Tim invented to describe his processes of using cameras and computers as tools to create images and art. He uses any and all digital processes to invent and “cre8” images, and now has utilized social media to share his art.
Shooting with the Better Light takes dedication and extra effort…it’s not the easiest way to create a photograph, but when you have the right place at the right time you may have an incredible, high-resolution image that no other capture system can produce.
Efficiency is essential to take the burden out of the photo excursion. Your portable Better Light studio should be built to provide all of your needs for lens options, computer accessories, and personal needs (See Tim’s itemized Better Light Field Kit List – 1.5 MB PDF). “Everything needed can fit in a backpack, but keep the total weight down — can you carry it for six miles? And work with the equipment so you can setup quickly. Ten minutes, “shoulder to holder” is my goal,” Tim stated.
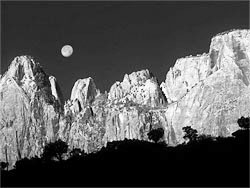
One of Tim’s favorite techniques is Infrared landscape photography with the Better Light scanning back. The scanning back does not have a permanent Infrared absorbing filter over the sensor as most digital cameras have, so it is ready for imaging with a mix of visible and infrared light or with infrared light only to create a variety of interesting images. You have to be willing to experiment since results are difficult to predict.
 He typically uses the very dark red Hoya R72 filter that lets a tiny bit of visible red through (50% cut-off at 720 nm), but produces great results. He prefers it to the black, “deep IR” filters that pass practically no visible light. Tim uses a 67mm diameter screw-in filter and uses step-down rings to fit the same filter to all of his lenses. The IR filter also cuts through atmospheric haze, which is often a bonus feature for landscape photography.
There are a few challenges to shooting infrared photos with the scanning back (or any digital camera). Some lenses will show a 'hot spot' in the center of the image since their coatings are optimized for visible light and not for IR. Hot spots occur only under certain conditions and APO lenses are usually better, but not exempt from problems. Fortunately, it is an obstacle that can usually be corrected with a little masking adjustment in Photoshop.
 Focus can be an issue with infrared, since infrared light focuses at a slightly different distance than visible light. It is nearly impossible to focus visually on the ground glass with the dark IR filter over the lens, so the Digital Focus tool in the ViewFinder software provides assistance to achieve optimal focus. Images should be evaluated carefully in the prescan preview to check focus and exposure.The sensor is very sensitive to IR, so infrared captures allow you to work at smaller f-stops or shoot at faster line times.
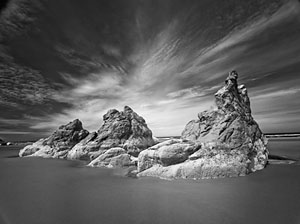
Successful images are more than luck. Take the time to plan ahead, get up early and stay late. Tim added a couple of tips, “If you are driving, be ready and willing to stop, and many times when everybody else has put their cameras away, the best images appear. You just don’t know where or when a great photo is waiting to be discovered. Look up…look down…look in all directions for the things that other people don’t see. If you think it is too dark to take a picture…try it anyway…you might like it.” And, if at first you don’t succeed…try and try again. Perseverance, persistence and passion lead to realization. Some of Tim’s best portfolio images are created after more than a dozen trips to the same location (Image on left is from the 19th tripto that location).
========================================
THAT’S ALL FOLKS…
Although this concluded the schedule for the Owners Conference, many of the attendees stayed another day to return on Saturday for an optional all-day workshop with Mike Collette or Randy Hufford. Several others took the opportunity to spend some time in San Francisco or take a photography trip to one of the many beautiful locations around the Bay Area.
Once again, all of our speakers deserve a special “thank you” for taking the extra time to prepare their presentations and being willing to share their photography and experiences with the group. Our Better Light owners group is very special and unique within any industry I have ever experienced. They possess so much talent and knowledge, but the most amazing characteristic is their willingness to share. Our “almost annual” Conference is the only place that a large group of scanning back experts can get together to reveal their treasured “trade secrets” and build lasting friendships. It is truly a win-win event where all of us come out a little bit smarter and motivated to try something new or push a little harder in our common quest for perfection.
Watch the Better Light Users Forum for next year's Conference information
and plan on joining us for a great experience..."you just gotta be there!"
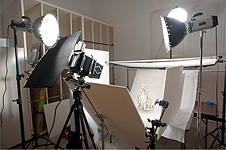
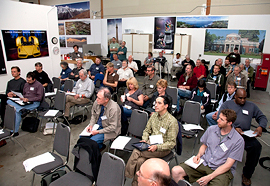
 Better Light's demo studio is annually transformed into our conference center. It has served us well for this size group and feels "more like home" than holding the event at a hotel meeting room.
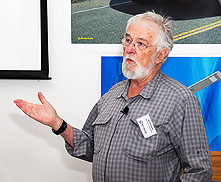
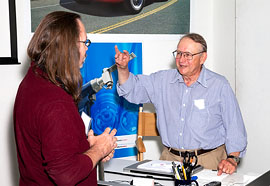 Mark Tierney (left) has some questions for Peter Grote after his program about landscape photography.
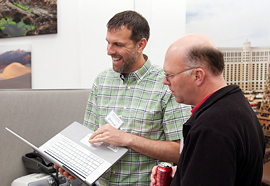 All around the room during breaks you will find small groups clustered around a computer in their own micro-seminars. Mark VanderSys (left), one of the presenters, shares some ideas with Doug Wilson.
 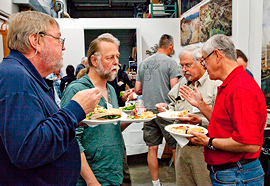 Lunch doesn't stop the conversations....and this is the extra bonus for attending. (L to R) Burk Scheper, Grant Kernan, John Csongradi and Reg Van Drecht.
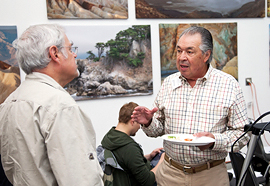 Jess Bravo (right) talks shop with speaker John Csongrotti during the lunch break about John's innovative use of the Pano Adapter.
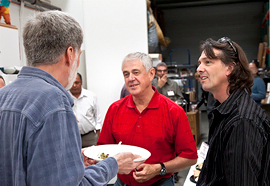 Mike Collette (left) is constantly involved in conversations with the owners. Reg Van Drecht from New Brunswick, Canada (center) and Robert Koppanyi from Geneva, Switzerland catch Mike for a question.
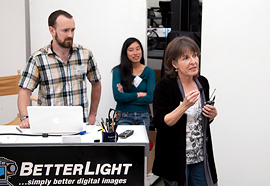 A proud mother...Mary O'Connor, photographer and instructor, introduces her son Ethan and Shannon Cheng who have created an exciting new lighting effects technology. This was the first public presentation of the patent-pending system.
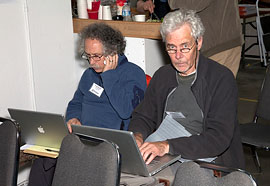 Never a moment wasted...Bay Area owners, Howard Brainen of Two Cat Digital in San Leandro (left) and Tom Burke of Santa Cruz catch up on email and phone calls during a break between speakers.
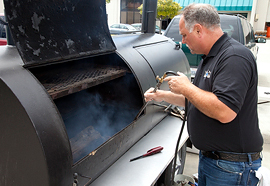 Gary's All Texas BBQ has been an important part of our Conference for years. Gary Cook (yes...real name!) gets the charcoal fire started for our Thursday evening dinner buffet of chicken, ribs & all the fixins.
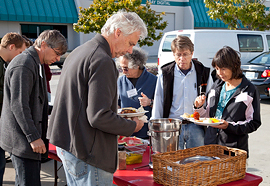 One thing about the Better Light Conferences...you don't go home hungry.For the dinner break on BBQ night an outdoor buffet line has everyone's favorites.
 Another tradition that was started after an group dinner at a local restaurant was offering an early evening presentation to the schedule.
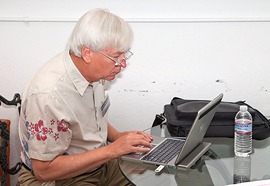 Speaking of traditions...every good speaker is cramming and adjusting presentation materials right up to the last minute...Tim Fleming was no exception.
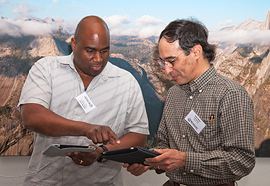 Juan Houston (left) and Peter Roos are comparing notes and apps on their tablets.
 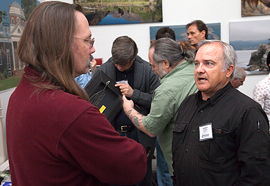 Robin Myers (right) of RM Imaging is discussing his new AIC PhotoDocumentation Targets with photographer Mark Tierney.
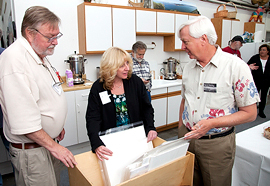 Tim Fleming (right) shows some of his infrared landscape prints to Sue Spence and Burke Scheper.
 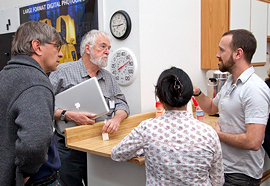 This conversation looks pretty deep...Ethan O'Connor (right) and Shannon Cheng (back to camera) talk about the ways their new technology could be applied with the Better Light scanning backs.
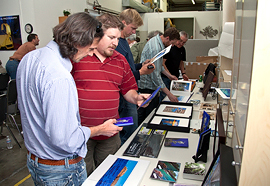 Randy Hufford brought a variety of portfolio books and albums and presentation samples for the group to see as part of his Thursday evening and Saturday workshop.
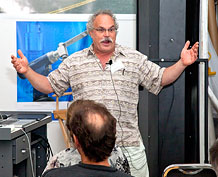
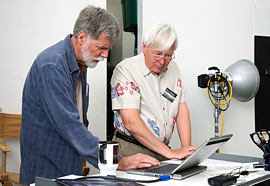 Mike Collette (left) does a little troubleshooting to add the projector profile and get Tim Fleming's computer operating with the digital projector.
 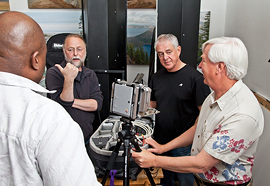 After his program, Tim Fleming (right) talks equipment for outdoor photography with "the Canadians" Juan Houston (left), Grant Kernan, and Reg Van Drecht.
 Randy Hufford, (second from left) sits down with his class on Saturday to identify the topics that the group would like to concentrate on during the day.
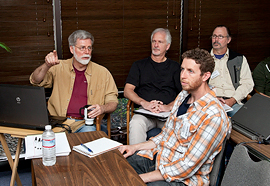 Mike Collette (left) held his popular "Advanced Image Processing" class in the front conference room. (L to R) Students included Mark MacDougall, Mike Meade, and Mark Tierney.
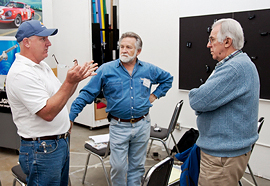 The conversations continue...students in the Fine Art Photography Workshop on Saturda, (L to R) David Courtney, Barry Levin and Richard Sjolund.
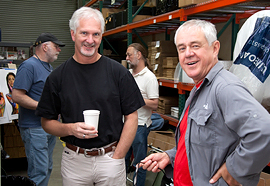 Our loyal Canadians...Mark MacDougall and Reg Van Drecht from Valley Graphic in New Brunswick, Canada have attended the last six Conferences.
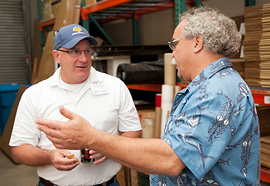 Randy Hufford and David Courtney talk about some of the new products available for the studio creating fine art photographic images.
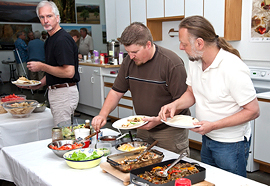 Saturday's lunch featured "Annie's Fabulous Fajitas". (L to R) Mark MacDougall, Keith Kountz, and Grant Kernan have a big appetite after the morning's session.
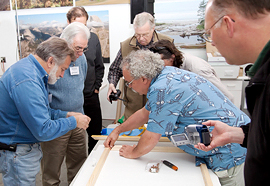 Randy Hufford demonstrates a stretcher bar that doesn't require gluing while Doug Wilson (right) video tapes the assembly steps.
 During the Saturday Fine Art Photography Workshop, Becky Hufford gives an overview of the software for retail picture framers from SpecialtySoft.
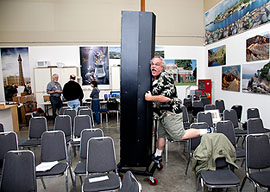 IT'S A WRAP...Randy takes a ride down the aisle on one of his copy lights. We are really trying to get him to loosen up a little.
— Photography by Larry Guyer —
PREVIOUS CONFERENCE REPORTS
2010 Conference – "Sometimes
Less is More..."
Summary and Photos from our
9th Conference in California
2009 Conference – "A Positive Influence in a Tough Economy"
Summary and Photos from our
8th Conference in California
2008 Conference – "Conference Returns to the East Coast"
Summary and Photos from our
7th Conference in Salem, MA
2007 Conference – "It's Not Easy...
But, It's Worth It!"
Summary and Photos from our
6th Conference in California
2006 Conference – The Hottest Ever
Summary and Photos from our
5th Conference in California
2006 Post-Conference Field Trip
Owners' Images from San Mateo's Pebble Beach
2005 Conference Emphasizes
Varied Applications
Summary and Photos from our
4th Conference in California
2002 Conference Followed
Photo Expo East
Summary and Photos from our
2nd Conference in NYC